Installing a server rack is more than just stacking equipment in a metal cabinet; it’s the foundational step for your entire network infrastructure. A poorly planned or executed installation can lead to overheating, network downtime, inefficient cable management, and even physical safety hazards.
This ultimate checklist breaks down the entire process—from initial planning and purchasing to final cable organization and system configuration—ensuring your installation is robust, scalable, and optimized for maximum performance and longevity. We’ll follow the essential phases of any successful deployment: Pre-Installation Planning, Physical Rack Setup, and Equipment Mounting & Cable Management.
Phase 1: Pre-Installation Planning & Preparation (The Critical Foundation)
The success of your server rack installation hinges on meticulous planning. Getting these steps right saves significant time, money, and headaches down the road. This phase focuses on crucial decisions regarding space, power, cooling, and equipment.
1. Equipment Inventory & Rack Sizing (The ‘What Goes Where’ Step)
The most common mistake is buying a rack that’s too small or lacks the correct specifications.
- Measure All Equipment: Accurately measure the height, depth, and weight of every device (servers, UPS, switches, patch panels, KVMs). Remember that rack height is measured in rack units (U), where $1U = 1.75$ inches ($44.45$ mm).
- Calculate Total Rack Units: Sum the ‘U’ requirements.
- Determine Rack Depth: Ensure the rack depth is sufficient to accommodate the deepest server plus the required clearance for rear cabling (network cable bend radius and power cords). A 42U rack is standard, but depths vary (e.g., 600mm, 1000mm, 1200mm).
- Plan for Expansion: Always leave $10\%-20\%$ of rack space and power capacity unoccupied for future growth and essential air-gap maintenance.
2. Location & Environmental Assessment (Cooling and Safety)
The rack’s location is paramount for cooling efficiency and safety compliance.
- Airflow and Clearance: Ensure there is adequate space around the rack (front, back, and sides) for proper airflow and maintenance access. A general rule is at least 3 feet of clear space in front and back.
- Floor Load Capacity: Check the strength of the floor, especially if installing a large, fully-loaded rack. A full rack can weigh several hundred pounds.
- Cooling Strategy: Plan your cooling and ventilation. Most enterprise equipment uses a front-to-back airflow pattern. Ensure your room’s cooling system (HVAC, CRAC unit) and the rack’s perforated doors align with this.
- Safety and Security: Verify compliance with local electrical and fire safety standards. Plan for physical security (lockable rack doors, limited access).
3. Power and Electrical Setup (No Room for Error)
Power planning ensures devices run reliably and safely.
- Power Distribution Unit (PDU) Selection: Determine the required number of outlets and the total amperage draw. Select the appropriate PDU (horizontal 1U/2U or vertical 0U) and its input plug type (NEMA, IEC) to match your power source.
- Uninterruptible Power Supply (UPS): Determine the required UPS capacity (VA/Watts) to provide backup power for graceful shutdowns. Plan to mount the heaviest items, like the UPS, at the bottom of the rack for stability.
- Dedicated Circuits: Ensure the rack is on dedicated electrical circuits that can handle the total maximum load without tripping breakers. Consider redundant power supplies and separate PDUs where possible (A and B side power).
Phase 2: Physical Rack Setup and Installation (Assembly and Foundation)
Once the planning is complete, it’s time for the physical setup. Always prioritize safety and stability.
| Checklist Item | Action & Best Practice |
| Inspect and Assemble | Inspect the rack for shipping damage. Assemble the rack frame according to the manufacturer’s manual. Ensure all bolts are tight. |
| Position the Rack | Carefully move the rack to its final location. Use server-handling equipment for pre-assembled, heavy racks. Safety Note: Never move a loaded rack with equipment inside. |
| Secure and Level | Use the leveling feet and anti-tip stabilizers (if included) to secure the rack to the floor and ensure it is perfectly level. Bolt the rack to the floor if required by local code or seismic zone. |
| Install Rails and Shelves | Adjust the depth of the server mounting rails to match your equipment. Mount all required rails (slide rails for servers, fixed rails/shelves for non-rackmount gear). Pro Tip: Use a cage nut tool to save time and fingers when installing cage nuts. |
| Cable Management Hardware | Install essential cable management tools: vertical cable managers (0U on the sides), horizontal cable trays, and patch panels. Installing these before equipment simplifies the process. |
Phase 3: Equipment Mounting and Final Configuration (The Build Out)
This is where the components come together, with a focus on organization for future maintenance.
1. Strategic Equipment Mounting (Weight Distribution & Airflow)
Mounting equipment strategically is key to safety and thermal performance.
- Bottom-Up Loading: Always install the heaviest equipment first, at the bottom of the rack. This includes the UPS, high-density servers, and storage arrays (SANs/NAS). This lowers the rack’s center of gravity, preventing tipping.
- Air-Gapping and Filler Panels: Install blanking panels (filler panels) into any empty $U$ spaces. This is critical for directing airflow from the front to the back and preventing hot air recirculation within the rack.
- Component Separation: Separate heat-generating devices from heat-sensitive ones (like UPS batteries). Switches are often placed mid-rack or toward the top, depending on cable runs.
2. Mastering Cable Management (The Art of Organization)
Efficient cable management dramatically reduces troubleshooting time and improves airflow. Labeling is non-negotiable.
- Power vs. Data Separation: Route power cables down one side of the rack (e.g., the left) and data/network cables down the other (e.g., the right). This reduces electromagnetic interference (EMI).
- Label Everything: Label both ends of every cable (power, network, fiber, console). Use clear, durable labels with a consistent scheme.
- Velcro, Not Zip Ties: Use Velcro straps for bundling cables instead of plastic zip ties. Velcro is adjustable, prevents over-tightening (which can damage cables), and is easily removed for maintenance.
- Shortest Path: Use patch cables that are the shortest feasible length. Excess cable should be coiled neatly and secured within the vertical cable managers, not left hanging in the airflow path.
- Avoid Blocking Access: Route cables to the side of devices, never across their front or rear access points, to ensure easy equipment removal and servicing.
3. Final Checks and System Activation (The Go/No-Go)
The final steps before powering on the system.
- Grounding: Ensure the rack chassis is properly grounded to the building’s earth ground.
- Power Verification: Double-check that all power cords are securely plugged into the PDU and that power redundancy (if planned) is correctly implemented.
- Initial Power Up: Power up the equipment incrementally (UPS first, then network gear, then servers/storage) to monitor for initial issues and to prevent inrush current spikes.
- Monitor Thermals: Immediately check the operating temperature and noise levels. Confirm that the airflow is working as planned (cold air in front, hot air exhaust out the back).
- Documentation: Update all documentation: rack elevation diagrams, cable maps, inventory lists, IP addresses, and physical locations. This is the single most important step for future maintenance and troubleshooting.
Your Complete Server Rack Installation Checklist Summary
This consolidated list provides a quick reference for the entire deployment process:
| Category | Checklist Item | Status |
| I. Planning | Equipment Dimensions & Weight Measured | ☐ |
| Rack Size & Depth Confirmed (with Future Expansion) | ☐ | |
| Location Environmental Check (Floor Load, Clearance) | ☐ | |
| Cooling & Airflow Plan Finalized (Front-to-Back) | ☐ | |
| PDU Sizing & Power Capacity Verified | ☐ | |
| UPS Sizing & Placement Planned | ☐ | |
| II. Physical Setup | Rack Inspected and Assembled | ☐ |
| Rack Secured, Leveled, and Bolted (if necessary) | ☐ | |
| Server Rails & Shelves Installed to Correct Depth | ☐ | |
| Cage Nuts & Installation Tools Ready | ☐ | |
| Vertical and Horizontal Cable Managers Installed | ☐ | |
| III. Mounting & Cabling | Heaviest Equipment (UPS, SAN) Mounted at Bottom | ☐ |
| All Equipment Mounted Bottom-Up | ☐ | |
| Blanking Panels Installed in All Empty U Spaces | ☐ | |
| Power Cables Routed Separately from Data Cables | ☐ | |
| Both Ends of ALL Cables Labeled | ☐ | |
| Cables Secured with Velcro Straps (No Zip Ties) | ☐ | |
| IV. Final Activation | Rack Chassis Grounded | ☐ |
| System Powered On Incrementally | ☐ | |
| Airflow/Thermal Performance Monitored | ☐ | |
| Documentation Updated and Stored | ☐ |
A professional server rack installation is a long-term investment in your infrastructure’s reliability. By following this expert checklist, you ensure your data center operates efficiently, safely, and is ready to scale with your business demands.
This video provides a visual, step-by-step tutorial on setting up a home server rack, which is a great way to grasp the physical installation concepts.

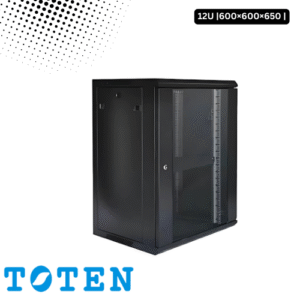
Toten 12U Server Rack 600×600×650
৳ 12,000.00
Toten 15U Server Rack 600x600x800
৳ 14,800.00
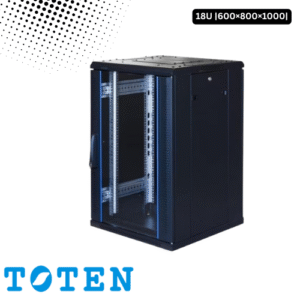
Toten 18U Server Rack 600x800x1000
৳ 24,000.00
Toten 18U Server Rack 600x600x1000